Rod Building 101
Fly Rod Building 101:
THE ROD BUILDING SEQUENCE
At Los Pinos Custom Rods/Custom Fly Rod Crafters we divide rod building into 3 parts: building, wrapping & finishing. Building is preparing the blank section, including mounting the tip-top & grip, wrapping is attaching the guides & finishing is applying the protective varnish or epoxy coating.
First; determine that the blank you have is what you wanted by checking tags and markings on the blank shaft, usually the butt section.
Second; make sure all of your components are appropriate for what kind of rod you're building, fresh or saltwater?
Note: Not all of the above is necessary; check the rod building sequence to determine what tools & materials you may need. Patience is absolutely essential.
1. Prepare the blank:
a. Check the length & make sure the tip & butt sections are approximately the same length, if not, trim the longer section with an abrasive cut-off disk or with the edge of a file, do not use a saw of any sort as the teeth will tear the graphite fibers.
Note: Typically trim the tip section 1/2" shorter than the butt section, when you glue on the tip-top the sections will be equal.
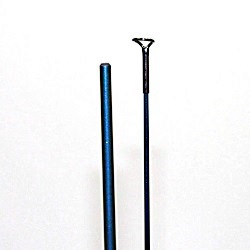
b. Find the guide side by holding the blank section (tip or butt) at a 45 degree angle and with a slight downward pressure rotate the section and you will feel the weak side of the blank come up, this is called spining whereas the "spine" is opposite the weak side or on the bottom and the guides go on the top side (the concave side).
Note: Spining the rod & placing the guides in the "casting plane" ensures an accurate casting rod.
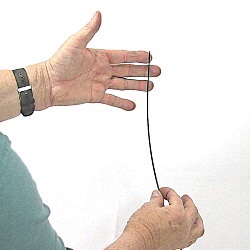
c. Repeat for the remaining section or sections for multi-piece rods. Mark the guide side on each section with a China marker.
2. Mount the tip-top:
a. Using 5-minute epoxy glue place the tip-top on the tip section in line with the guide mark. Clean up excess glue with denatured alcohol & lint-free wipes.
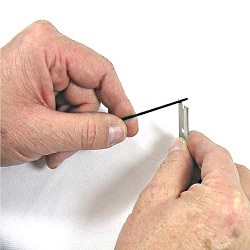
Tip:Cleaning up excess epoxy glue with alcohol works only when the epoxy has not cured!
3. Measure & mark for reel seat:
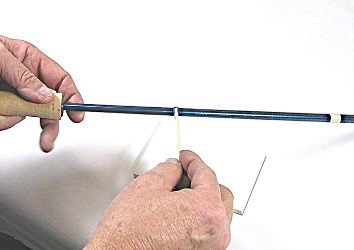
a. Measure the length of your reel seat and mark the blank from the end of the butt section & lightly scribe a mark using the thread burnisher or place a piece of masking tape to indicate the end of the reel seat next to the grip. Do not glue on the reel seat at this time! You will need the end of the blank for turning while the rod is drying & the added weight during wrapping is unnecessary.
Note: Depending on the thickness of the reel seat butt plug, you may have to trim a bit of the butt section prior to final reel seat assembly.
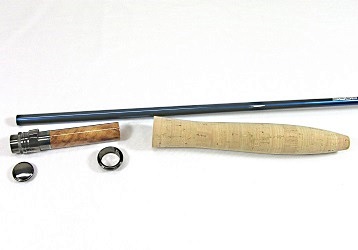
4. Measure & mark for grip:
a. Measure the length of the grip, then measure up the blank from the reel seat mark & scribe the blank again at this measurement.
b. Scuff the blank with sandpaper or Scotch-Bright pad from the forward scribed mark to the end of the butt section to give a good gluing surface.
5. Mounting the grip:
A. Using a preformed grip:
a. If necessary ream out the cork grip hole with a tapered reamer to get a good even fit with the grip; not too tight & not to loose.
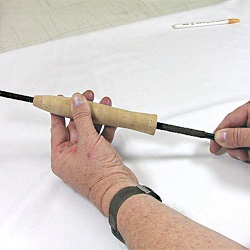
Tip: A tapered blank needs a tapered hole in the grip for a proper fit.
b. Glue grip with 5-minute epoxy glue making sure you have enough glue throughout the length of the grip.
c. Clean up excess glue with denatured alcohol.
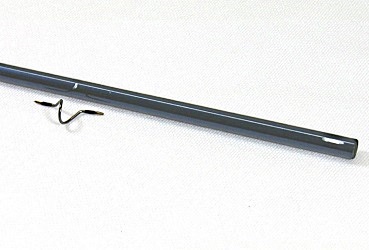
CAUTION! Some chemicals such as acetone & MEK may damage the blank finish.
B. Building the grip with cork rings:
a. Determine the number of cork rings needed for the length of grip desired.
Example: 6-1/2" long grip = 13 (1/2" thick) rings.
b. Ream out the rings to a snug but not too tight fit on the blank.
c. Glue rings with slow-set epoxy glue and install a cork clamp to ensure a tight fit and thin glue lines. Clamping also insures the rings will be perpendicular to the blank shaft.
d. Clean up with denatured alcohol.
e. After the glue has dried, spin the blank section (lathe, drill motor, with steady rests, etc.) and sand the cork rings to the desired shape.
Tip: Start with 40 grit and finish with 400 grit.
f. Fill the imperfections in the cork with cork filler putty or a mixture of glue & cork dust and re-sand to finish the grip.
6. Install the winding check (optional):
a. Place the winding check down to the grip but do not glue; the wraps and the rod finish will hold it in place.
7. Mark the guide spacing:
a. Mark the blank with the China marker at the correct guide placement for the length of rod you are building.

Tip: As a rule of thumb; the number of guides (not counting the tip-top) plus one for every foot of length of rod.
Example: a 9' rod will have 10 guides.
b. Guide spacing measurements are to the center of the guide, measured from the tip-top with sections assembled. See our guide spacing chart.
8. Wrapping on the guides:
a. Check that the guide feet have been properly ground to a tapered front to allow for a smooth wrapping transition up the guide foot & remember the smaller guides go toward the top of the rod, no kidding.
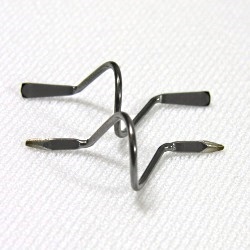
Note: Typically 3 to 4 sizes of snake guides are used.
b. Check that the thread is under the proper tension (use a thread tension device or makeshift a tensioner with a cup & phone book). The proper tension will allow you to adjust the guides after you have wrapped both feet for final alignment.
CAUTION! Too much tension can damage the blank.
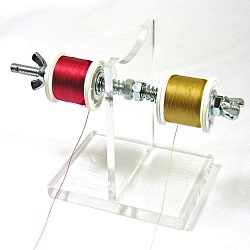
c. Make sure the wraps on each side of the guide are equal lengths by measuring from the bend of the guide and not the end of the guide foot.
d. Using the blind thread wrap technique, similar to a whip finish or the nail knot.
Start the wrap by crossing the thread over itself. Continue capturing that section of thread until the wrap is approximately 1/8” long. Then closely trim the tag end. Continue wrapping up the guide foot and stopping to within 1/8” (6-8 turns) of the end. At this point place a loop of thread opposite the guide and the loop should point to the center of the guide. Continue wrapping over the loop to the end of the wrap. Maintain wrap pressure with your finger and release the thread tension and cut approximately 3 inches of thread to place through the loop end. While still maintaining pressure, pull with the loop from under the thread wrap and then trim the tag end with your x-acto knife.
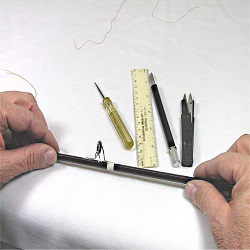
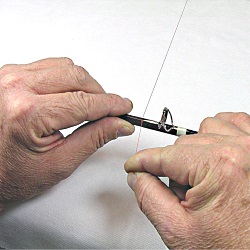
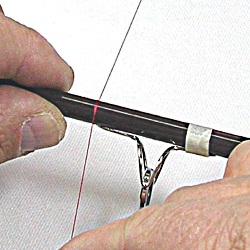
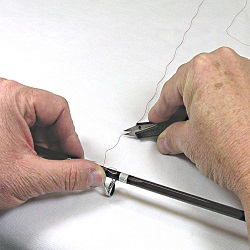
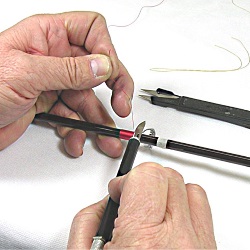
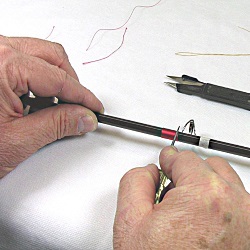
e. Check guides for proper alignment after all the guides are installed by sighting down the rod. Redo those guides that are not in alignment.
f. Burnish the thread wraps to close any gaps & remember to burnish from the edges of the wrap to the center.
g. Wrap on the hook keeper.
Tip: Typically the hook keeper is installed in line with the guides.
h. Use only nylon, polyester or silk thread, no cotton! Size A is the recommended thread size for fly rods.
9. Install the ferrule & tip-top wraps:
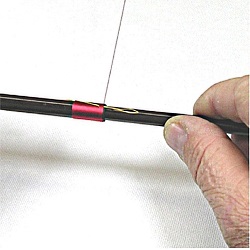
a. Ensure that the ferrule wrap(s) are installed. As a minimum 1/2" long for both sides of spigot ferrule and for the female ferrule of tip-over or sleeve type ferrule. The tip-top wrap is usually the same length as the uppermost guide wrap.
10. Inscribing the rod:
a. Using a Gel-Roller-Pen or pen & ink, inscribe your custom rod with your name and all other pertinent information. Allow to dry, then coat this area with protective rod finish.
Tip: Do this step in between the first & second epoxy coats to prevent ink bleeding onto the thread wraps.
11. Apply the rod finish:
a. If you are using rod varnish, apply thin coats and let dry the manufacturer’s recommended time between coats. You may have to apply 6 to 10 coats depending on the desired look. By using thin coats you will not have to rotate the rod while the finish is drying.
b. If you are using 2-part rod epoxy finish, follow the manufacturer’s instructions carefully and measure & mix the finish in approved mixing cups only.
CAUTION! Using unapproved mixing cups or syringes may result in the finish from curing properly. The syringes are used make sure you have equal amounts of part A and part B. Do not clean the syringes but do draw the plunger from the bottom shoulder of the syringe approximately 1/2" and let drip into separate containers.
CAUTION! Do not let the syringes come into contact with each other.
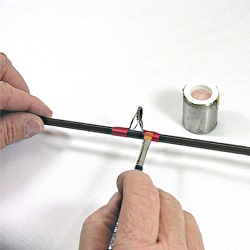
Tip: Average working time for epoxy finish is about 20 minutes.
c. If using epoxy finish, the rod must be rotated for about 2 hours and usually 2 coats of finish are adequate.
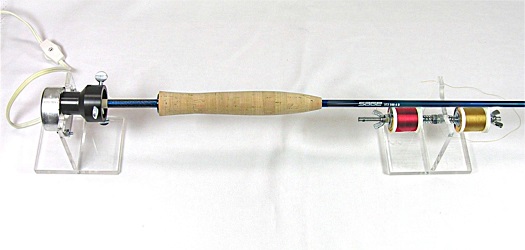
Note: After two hours the finish is set but NOT dry, DO NOT TOUCH! Allow 12-24 hours between coats.
d. Apply rod finish over any specification markings or inscriptions.
e. Clean your brush with lacquer thinner or epoxy brush cleaner.
f. Allow rod finish to completely cure prior to fishing, About 1 to 2 days.
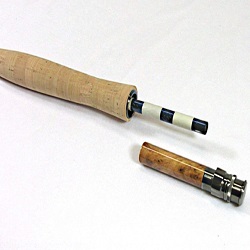
12. Mount the reel seat:
a. Using masking tape build two tape arbors to make up the difference in the blank diameter and the reel seat bore diameter.
b. Using 5-minute epoxy glue, apply glue over the masking tape arbors and apply glue inside the reel seat.
c. Check alignment of the reel seat to make sure the hoods and/or the mortise is in line with the guides.
13. GOOD LUCK! & GO FISHING!
Don’t forget to protect your investment with a rod bag & a good quality rod case.
